Making a Word Clock in Blender
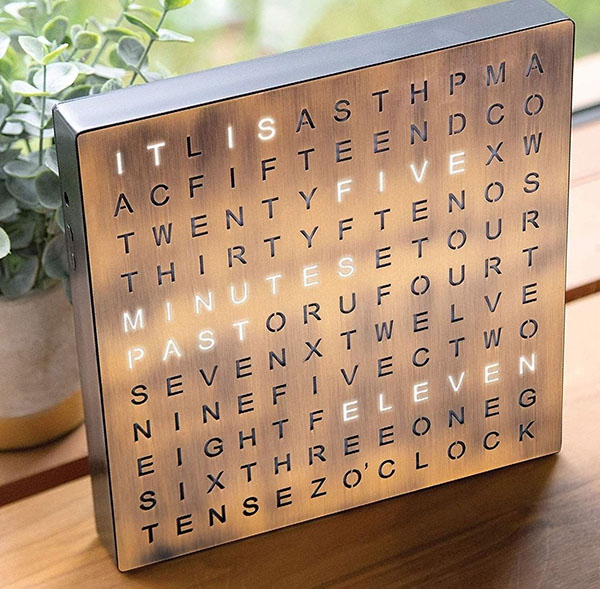
A few days ago, I saw this photo of a word clock on reddit, and it reminded me the fun I had creating my own Turkish Word Clock for Pebble. I'm currently learning how to use Blender, so I thought it would be at least equally fun to recreate this scene in Blender.
But I get no joy from things that I don't over-engineer, so I wanted to make one that actually works: The correct words should light up, and the sunlight should look correct-ish, throughout a whole day. Without animating either by hand.
Creating the model
I quite like how the original looks, so I incorporated most of the elements from the original in my scene: the brushed metal look of the clock, the wooden shelf and the plant. I even decided to use the same camera angle (using fSpy) and the same arrangement of letters on the clock face. If it ain't broke, don't fix it, right?
So I created a cube, and scaled it so that it matched the dimensions in the reference. Then I beveled the edges, and made a shallow inset, so that I can put the "backlight" in there later on.
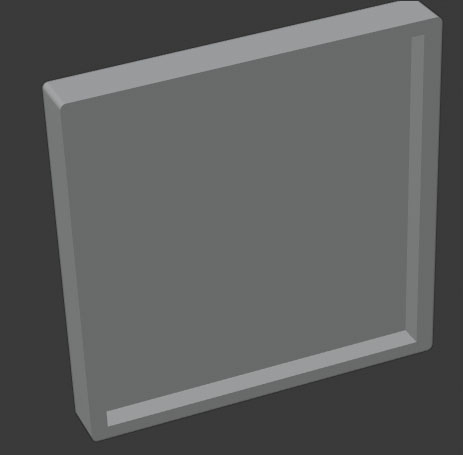
The front panel was also quite straightforward. I added a Text shape, typed in the letters from the reference, extruded it, converted it into a mesh, and subtracted it from a plane using a Boolean difference modifier.

This was basically the whole clock. The rest were secondary elements that “you shouldn't be modeling” , so I went to Poliigon to get some textures and a plant model. Now I had a word clock, sitting on a shelf beside a potted plant. Life was good, but a bit too inert. It was time (hah) to fix that.
Fun with nodes
I wanted to somehow emulate an individually-addressable 11x10 LED panel, because, you know, you have to build dumb sh*t. And besides, if I were to solve this problem, that meant that I could make other word clocks, in different layouts, sizes and languages, without much effort.
I created a plane, positioned it behind the front panel, applied a new material to it, added a bunch of nodes, and behold! It was working perfectly.
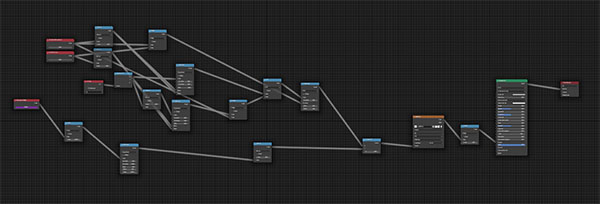
Just kidding. It took me a whole evening, an angry night of sleep and the whole morning to come up with this. I actually dreamt about UV maps and the node editor. Better than my recurring nightmares of wasps getting stuck in my beard, but still not ideal.
But let's start with the basics. I had a plane. That's a very simple object, and I could leverage that. In fact, its UV coordinates would be the basic building block of my material.
UV Map node for my plane
Placing a Separate XYZ node after the UV Map node,
I could work independently with the X and Y values. I added a Map Range node
after X, mapping the 0-1 range to 0-11. I also selected
Stepped Linear instead of Linear, with a step count
equal to the max value, so that the output of the Map Range node is always an
integer. I did the same thing for the Y value, mapping the 0-1 range to 0-10. And just
like that, I had split my plane's material into individual and discrete regions.
Map Range & Stepped Linear,
I get integer coordinates for my plane, which are easier to reason about
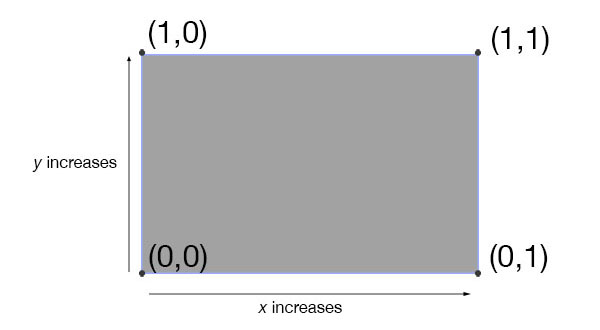
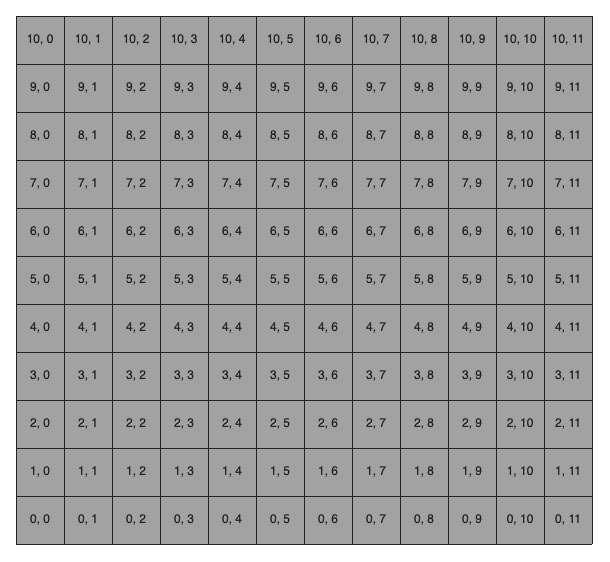
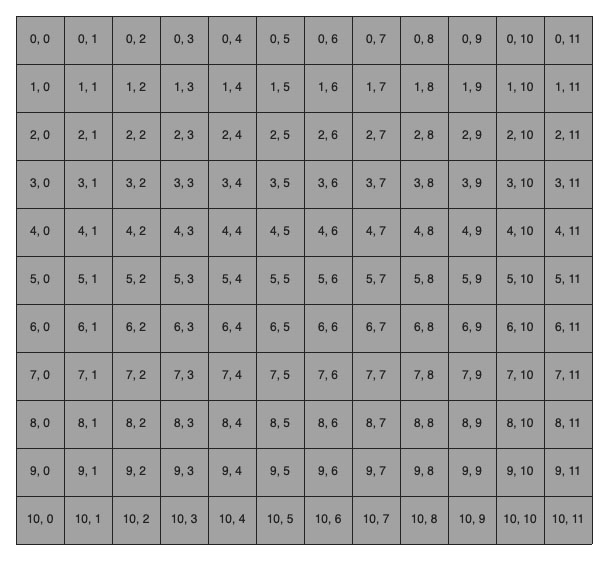
Now, this is all fine and dandy, however, I'm really more comfortable with having the 0,0 at the
top-left corner. So I put a Math node between the Y output of the
Separate XYZ node and the Map Range node
to subtract the value from 1. And just like that, I had my basic grid to work with.
At this point, I needed a way to turn individual sections of my grid on and off. Specifically, I needed a function which, given the number of minutes since midnight and an XY coordinate, would return true or false. There is no simple mathematical expression that I know of that can take in those three numbers and produce what I wanted. So I needed a lookup table of sorts. A lookup table that maps 3 integers (x, y, t) to a boolean.
Fortunately, in computer graphics, a texture is equivalent to a lookup table: They map 2 integers x, y to a value, the color of the pixel at the coordinates (x, y). But there was a small problem: I needed to map 3 integers into a value.
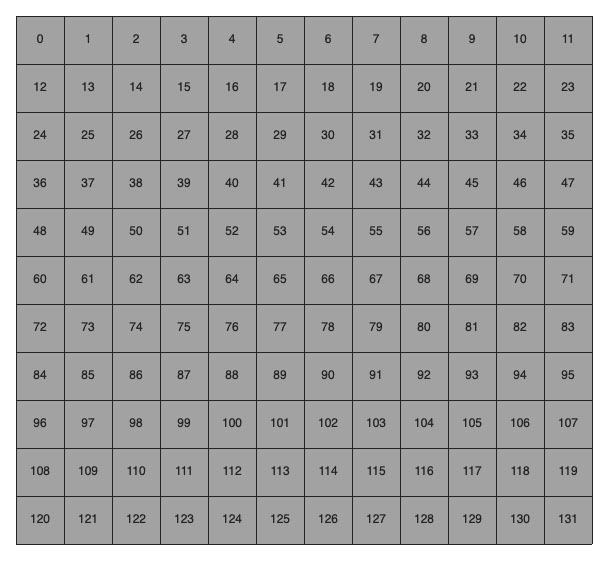
Luckily, it is possible to represent a 2-dimensional grid as a 1-dimensional line — after all, memory is linear. Taking advantage of this fact, I could reduce my (x, y, t) input to a (n, t) input.
To convert my (x, y) coordinates to n, I placed a Math node
after the Map Range result of the Y output, to multiply it by 12. I added another
Math node immediately after that to add it to the
Map Rangeresult of the X output. This effectively gave all the sections of my
plane their own id.
Small Data
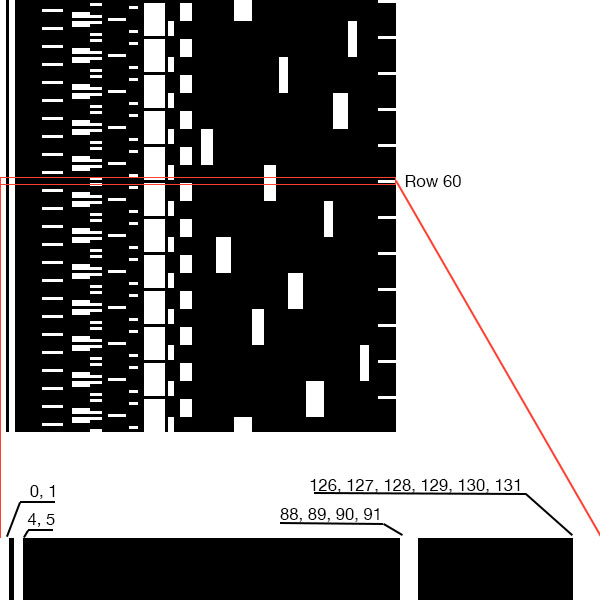
How do we go from 17:00 to "Turn on I, T, I, S, F, I, V, E, O, C, L, O, C, K"? First, we know the layout, so that we can see that those letters are at the positions "0, 1, 4, 5, 88, 89, 90, 91, 126, 127, 128, 129, 130, 131". Second, since word clocks have a 5-minute resolution, we can enumerate all the five-minute intervals of the day, so they are assigned sequential integers as well. Starting from midnight, we can say that 00:00 is 0, 00:05 is 1, 00:10 is 2 and so on. 144 intervals in total.
Imagine an image file filled with solid black. Let's just consider one row of pixels from that image: Row 60. In this row, let's paint the following pixels white: 0, 1, 4, 5, 88, 89, 90, 91, 126, 127, 128, 129, 130, 131. Congratulations, we've just associated the number 60 with this sequence of numbers. And based on our little scheme from earlier, the number 60 corresponds to 17:00. If we repeated this for all 144 intervals and all 132 sections, we get a 132x144 image that we can use as a texture.
Now, we have to go back to the UV coordinate system, because that's what Blender uses for textures as well. I
added another Map Range node, mapped my 0-131 range to
0-1. This is the X coordinate to use from the texture.
For the Y coordinate, the job was pretty simple. I created a Value node, called
it "Minutes since midnight", added a Math node to calculate modulo 720 of
its value, then I added a Map Range node to transform the 0-720
range to a 0-1 range with 143 steps. This corresponds to our little scheme from earlier. And that
essentially became the Y coordinate to use from the texture.
I added a Combine XYZ node, plugged the X and Y values into it, connected its
output to the Vector input of anImage Texture node
with my texture selected, and connected its Color output to the
Emission input to the default Principled BDSF
shader. And that was it. Changing the "Minutes since midnight" input value would result in displaying the correct
time on my very virtual word clock.
Not done quite yet
I could have animated the "Minutes since midnight" value to go from 0 to 1440 and called it a day. But, my scene had a window, so I could see outside. I decided to animate the sun as well. And since I'm lazy, I don't want to animate these two separately. I wanted to have a "single source of truth" of the day's progress, and derive both "minutes since midnight" and the position of the sun from it. I don't want it if I can't over-engineer it, damn it!
Blender has an add-on to calculate and set the sun's position based on a location, a date and the time of the day. I enabled the add-on and let it control my sun. I selected Stockholm City Hall and 21 March 2020 — because springtime is absolutely stunning in Stockholm.
I created an Empty object, which is invisible, and whose sole purpose is to have
properties, like rotation, that we can animate. I set my animation length to 288 frames, and animated the
Empty's rotation around the Z axis to make one full rotation over the length of
the animation. I will use its rotation as my single source of truth: I consider one full revolution to be one
day, so, in a sense, this Empty represents Earth, I guess.
I created a driver for the "Minutes since midnight" value. It looks like this:
round((rot/(2*pi)*1440)%1440), where rot is the current Z rotation of the
Empty. This is essentially a Map Range operation,
mapping one full rotation to integers between 0-1440.
Then I created a driver for the Time value for the Sun position add-on. That one
is very similar:rot/(2*pi)*24. It maps one full rotation to real numbers between 0-24,
the format that the add-on expects.
And that was it! When the Empty rotated, the sun moved, the clock updated itself,
and it was good. Except that I ran into a potential bug with the add-on where rendering animations would not
update the sun's position, but rendering individual frames would work fine. I spent a couple of hours trying
workarounds, and I eventually "baked" the keyframes, and removed the add-on completely.
Putting it all together
I rendered a frame at full size, and quickly realized that it would take my computer about 2 full days to render all the frames. So I went to RenderStreet, prepared to pay a few bucks to render it on their render farm, and was happily surprised that they were offering a 1-day trial for $1. Uploaded my file and left it alone for a while.
In the meantime, I put together a very basic React app to display the frame that corresponds to the current time, and fades in the next one when it's time. This was the second most aggravating experience of this whole thing. I really did not want to involve React in this. I really wanted to write some TypeScript and manipulate the DOM manually. But after half an hour of frustration trying to set up a minimal TS project, I gave up and reached for create-react-app. So, yeah, I don't know what that says about me, or the modern web tooling.
In the end, I uploaded the app to clock.yasa.gs, which will show you the time as if you were in Stockholm City Hall on the March Equinox of this year. Talk about niche.
I also got this cool animation out of it, which kinda makes the whole thing 100% better: